Monday, September 26, 2011
Review: Around the Corner Crochet Borders
I bought Around the Corner Crochet Borders by Edie Eckman this month and although I haven't had the chance to make anything from it yet, I am impressed! It is full-colored with lots of great ideas for colors that would look great with each edging. It is FULL of information about how to adjust so that you can add a border to any fabric project or to a crocheted item.
There are also charts, pictures and instructions for 150 different edgings. There are open and loose designs, tight designs, designs which incorporate flowers, spirals, bobbles and shells. I am excited to have ideas for flannel blankets, clothing edges and blankets. There are so many to choose from! I may never have to choose the same one twice for a long time! That is unless I fall in love with one!
Monday, September 19, 2011
The Sharp Crochet Hook
I just learned about a great new crochet tool. It's a crochet hook with a sharp tip for getting into fabrics for making a beautiful edge. You'd no longer have to get things hemstitched to crochet around the edge! I just bought an edging book, too! Yay! I hope to get one of these Sharp Crochet Hooks, soon.
Monday, September 12, 2011
Elise Hats
I bought this hat pattern at the beginning of the month and I have already made two and a half of them. I may be giving lots and lots of these away! It is really simple once you get the hang of it and it turns out looking beautifully! This one is for the new baby of a friend! I got the pattern from: www.mamachee.etsy.com . The pattern also includes a flower to go on the side, but I loved it just like it was!
She has tons of awesome patterns and ideas! She is also the owner of the blog Easy Makes Me Happy, listed on the side.
Review: The Crochet Stitch Bible
The Crochet Stitch Bible by Betty Barnden is probably my favorite crochet book to this point. It isn't a book of patterns to make purses or afghans, but it is full of stitches that you can use to make anything you want. It has lots of instructions for various different techniques as well. Each stitch is described, shown with a graph and beautifully photographed. There are stitches using simple stitches with minor changes as well as intricate alterations as you gain skills and confidence.
You can easily take a simple pattern or idea and make it look amazing with these stitches!
When I am trying to make something new, The Crochet Stitch Bible is usually the first place I go to decide what the crocheted fabric will look like.
You can easily take a simple pattern or idea and make it look amazing with these stitches!
When I am trying to make something new, The Crochet Stitch Bible is usually the first place I go to decide what the crocheted fabric will look like.
Saturday, September 3, 2011
Double Crochet (dc)
Start a row of chains. For practice do as many as you'd like:
Yarn over.
Insert hook in 4th chain from hook.
Yarn over and bring a loop through the chain. You will now have 3 loops on the hook.
Yarn over and pull the loop through two of the loops on your hook. Two loops will be left on the hook.
Yarn over and pull through the two remaining loops on your hook. Double crochet (dc) created!
Continue to the end of the chain, inserting hook into the next chain each time. At the end of the row, chain 3 and turn the work.
At this point, you'll have to follow what the pattern says. Some patterns will have the chains at the beginning of a row count as stitches and some don't. In this picture, I didn't count them, so there are chains at the end that you do not work stitches into and you don't count as you go.
The thing you have to be careful of is when they don't want you to count them and you do, you end up with a much wider end of project than beginning. The easiest way to avoid this is to just count at the end of each completed row.
Wednesday, August 31, 2011
Working in the Round Deux
I thought I'd make working in the round a bit easier. Sometimes I forget to do that! This is more to learn the skill than to make something. Although, you could make the large hole in the middle be a button hole if you wanted to attach it to something...
Start with 8 chs.
Insert hook into the first chain and make a slip stitch.
Insert hook into the chain loop you have just created.
I continued on making sc in the loop. It looks like I stopped at 13 for some odd reason. At this point you are just practicing, so just make whatever fits.
At this point you make a choice (or follow the pattern if you are doing something other than practicing).
You can either make a slip stitch in the top of the first sc.
Make a chain.
And continue on, making two sc in every other stitch and one in the other.
OR you can create a sc in the top of the first sc...
...and continue on.
There are a couple of differences and reasons why you'd choose each. When you use the slip stitch method, the end of the round is much more obvious. The downside, is that when you are making a larger item (like a hat) there will be a line going down the side where the end of row is.
When you choose to use a sc instead, you have to mark the end so that you know when you need to change or where to count from. The great thing about it is you can have a completely invisible end with no seam.
Have fun and please ask if you have any questions!!
Monday, August 29, 2011
Multi-Colored Daisy Scarf
I've been making these scarves for a while now and one of these days I'll get the pattern completely written out.
I thought it'd be fun to make one for my 6 yr old that was a variety of colors rather than the ones I normally do.
What do you think?
I thought it'd be fun to make one for my 6 yr old that was a variety of colors rather than the ones I normally do.
What do you think?
Half Double Crochet
To make a half double crochet (hdc), make a chain of your desired length. Yarn over:
Insert hook into the third chain from your hook:
Yarn over and pull a loop through the chain. You will now have three loops on your hook:
Yarn over and pull a loop through all three loops that are on your hook:
You have made your first hdc!
Generally, to turn and make another row of hdcs you will work to the end and chain 2, then turn.
I like to use hdcs when I want a look/feel that is softer than using a sc, but firmer than a sc. They are a nice in-between stitch.
Saturday, August 27, 2011
I'm working on a mermaid toy for my daugter...
...and it looks like it's related to a snowman. I think I'll try using a pattern next time!
Wednesday, August 24, 2011
Charity Links
Check out the new page at the top for charity links. There are SO many people out there who are crocheting, knitting, sewing and anything else they can think of to help other people!
If you want, we could choose a pattern and I could help you with it so we could donate to some of them!
If you want, we could choose a pattern and I could help you with it so we could donate to some of them!
Saturday, August 6, 2011
Free Bootie Pattern
I can't actually take full credit for this pattern. Several years ago at a church activity, a sister was teaching crochet and she gave out this pattern. I had a baby with me, so I couldn't sit down and learn it then, but she sent me home with a pattern and her sample booties. I have since lost the pattern, but by looking at the booties, I have reconstructed it.
Here is is:
Newborn Booties
Make 2:
Ch 8
Row 1: sc in 2nd ch from hook and sc to end; 3 sc in last ch. Working in free loops, sc across (15 sc)
Row 2-8: ch 1, turn; sc in each sc in back loop only.
Row9: Ch 3, turn; dc in each sc, join to first dc.
Round 10 & 11: (do not turn) ch 3, dc in each dc around, join to first dc of round
Round 12: ch 1, (dec with sc over two dc) twice, dec with sc over 3 dc, (dec with sc over two dc) twice. (use hidden type for better visual appeal). FO leaving long end. Weave end through sc of last round and hide end.
Ties: ch 50, FO. Weave into top of bootie leaving room to tie a bow over ankle.
Alternate flower ties: ch3, dc in first ch, sl st in chain (ch 2, dc in first ch, sl st in chain) twice. Continue on with 50 ch. Before cutting off, weave chain through bootie. (ch 2, dc in first ch, sl st in chain) three times in 3rd chain from hook. FO, weave in ends.
Meeting Time
At our last crochet group, we decided to start doing this once a month on the first Thursday of each month. Since we've gone through the basics and everyone is at a different level, I want to continue to mostly just have us come and crochet. We can each work on a different project with maybe a few tips thrown in. I don't want to keep adding new things each time. Let's just have fun and learn together.
As always, if you need ANY help in between, don't hesitate to call, text or email me!
As always, if you need ANY help in between, don't hesitate to call, text or email me!
Wednesday, July 27, 2011
Easy Patterns For Our Next Group
For our next group (August 4th at 6:30) please bring something you want to work on. Whether it's the water bottle holder, one of these patterns or something you've found, I want to let you do what you'd like at this point and I'll help you as you need it!
Tote Pattern
Granny Square Pattern
Beanie Pattern
The charity links at the right also have some patterns that may work for you.
If there is anything you'd like me to help you find, just leave a message here or call and I'll do my best!
Tote Pattern
Granny Square Pattern
Beanie Pattern
The charity links at the right also have some patterns that may work for you.
If there is anything you'd like me to help you find, just leave a message here or call and I'll do my best!
Monday, July 25, 2011
YARN!!!
I just had to share that since Sugar n' Cream and Peaches and Creme yarns are now owned by the same company, Wal-Mart has started actually carrying a decent selection of yarns. It's so nice to go and see TONS of color rather than just a few uglyish ones!
Add to it that other companies are making some awesome yarns that are easy to get, I'm in crocheter's heaven!
I just thought you should know!
Add to it that other companies are making some awesome yarns that are easy to get, I'm in crocheter's heaven!
I just thought you should know!
Sunday, July 17, 2011
3 ways to Crochet in the Round
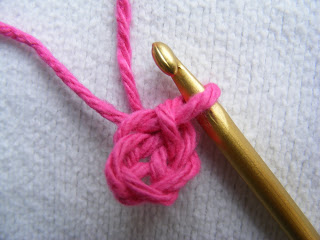
As with most things, there are several ways you can crochet in a round. My favorite way, and the one that I think is easiest to get stitches into is the Magic Ring. It is the easiest to get the hook into several times and you can do as many stitches as you want.
In a ring made from several chains is probably the easiest to start with. It is easier to hold onto.
In a ring made from several chains is probably the easiest to start with. It is easier to hold onto.
In a chain of stitches.
Ch 4. (Or whatever the pattern calls for.)
Sl st in first ch made.
Ch 1. (Or more for taller stitches.)
Make number of single crochets called for in pattern.
When you get to the end, you can either make a slip stitch in the first single crochet made or make a single crochet in the first single and mark the last stitch in the round. The second method creates a seamless piece.
Magic Ring
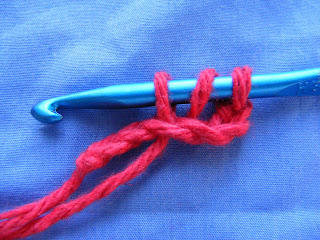
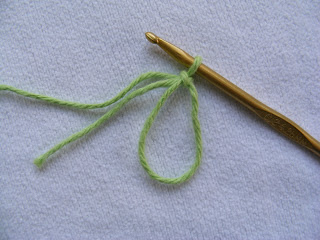
Make a loop around your hook.
Yarn over and pull up a loop.
Make a slip stitch.
Make desired number of single crochets.
Pull tail tightly. You can adjust the size of your center hole at this point.
Insert your hook into the first single crochet you made in the circle.
Create a single crochet.
In one chain.
Chain two. (or more for taller stitches)
Chain two. (or more for taller stitches)
Insert hook into first chain.
Yarn over and make a single crochet.
Continue making the desired number of single crochets (or other stitches) in chain.
Third Meeting Time
I'm going to have to find a new meeting time for our third go around. I'm going to be at Bear Lake for the time we scheduled...
Thursday, July 14, 2011
Water Bottle Tutorial
Here is the picture tutorial for the water bottle holder for class:
Add strap. Finish off.
Chain 4
Insert hook into first chain made.
Yarn over and pull through loop on hook. (Sl st)
Ch 1.
Sc in circle.
(sc in circle, ch 8) 6 times.
One loop made.
Sl st in first sc made.
Ch 4.
Sc in top of next loop.
Ch 8.
Sc in next loop.
Continue until desired height.
Add strap. Finish off.
Subscribe to:
Posts (Atom)


